Monday, October 28, 2013

St Kilda Primary School Fete

Our School St Kilda Primary held its Fete on Sunday and what an amazing day it was. We have a number of celebrity parents and some very dedicated parents which make it one of the best fetes around.
There was Rockwiz for kids hosted by Brian Nankervis. A comedy room with acts from Rhys Muldoon, Bev Killik, Colin Lane and Greg Fleet. A talent show "So you think you can do stuff" and Live music including Joe Camilleri. Rides, Beauty Parlour, Art & Craft, Dunking Machine, Show Bags, Yummy food, the list goes on.
I was part of the Craft Mama stall and want to share some pics from the day.
Thankyou to all the ladies especially Annie Stanford for helping with sewing, cutting, ironing and sharing a cuppa with me.
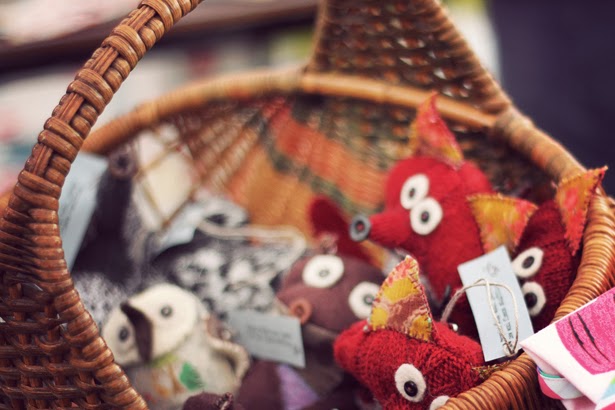
 Felted and knitted animals made by Saffron and Carolyn
 Dolls and Owls
 Dolls now named "Annie dolls" . Made by Annie S and Annie M
These were made using a free pattern from Seventy Piggies
 Enjoying a cuppa before the show starts
 Beautiful Lavender Bags
 Annie & Annie
 Gorgeous knitted dolls by Annie S
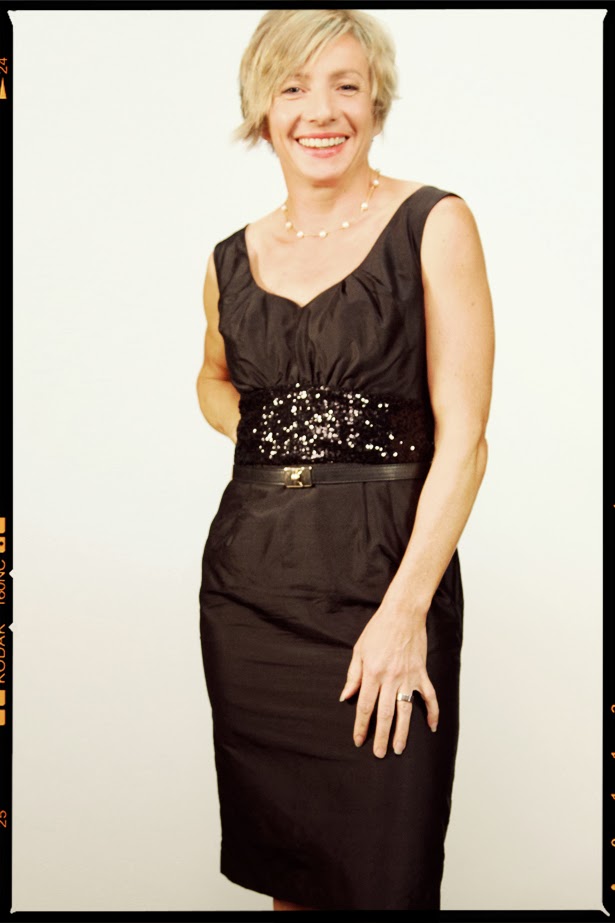
A happy customer

It was such a fantastic day and the kids had a ball. I have to say I am exhausted and am looking forward to putting my feet up for a while!
annie x

Thanks to Tone for the photography 

Tuesday, October 22, 2013

Signature Style for Project Sewn

This is the final week for the sew along at Project Sewn. The challenge this week is to create your "signature style".
I have been just far too busy this week to create something new as our School Fete is on this Sunday and I am heading up the Craft Mama's so every waking hour has been dedicated to that. My back is killing me!! 

I am a little disappointed I couldn't come up with something new for this but I have the perfect dress to enter anyway. I designed this for the Tessuti Awards just a couple of months ago. 
It is so me. A little crazy, alot of fun and very vibrant!

I hope you like it. You can read more about the making of it here

Please vote in the Project Sewn challenge here if you like it. I'm dress number 9.
(Voting starts on Friday 25th of October).


Wednesday, October 16, 2013

I heart St Kilda dress

It's week number three in Project Sewn's sew along competition. This week the theme is "graphic print challenge".
Before I go on you can vote here from Friday October 18th until Sunday October 21st (give or take depending on which country you live in).
I had plenty of graphic prints in my stash because I love prints. I tossed up between a few but finally settled on a fabric I picked up from a little fabric shop in Brunswick.  It's just your basic cotton poplin and cheap at $5 per meter. It was one of those kind of purchases where you get home and say to yourself "what the heck was I thinking" and "what on earth am I going to do with that!". So needless to say it's been hanging around for a while. However, when I pulled it out I immediately thought it would be a perfect fabric for a graphic challenge as it is so strong and bold.
I did a bit of research and found a great little asymmetric design with a batwing sleeve and in a mini length. I think with such a bold print having as little dress as possible is a must.
I was a bit naughty and purchased a new pattern, although it was on sale for $5! Bargain. It's Burda 7225 which is a "young" pattern. I thought this wouldn't matter but I had lots of problems with the fit so perhaps this is why.
The idea was to use the pattern for the main body design and to draft a batwing sleeve. It all seemed to go well with the drafting so I just cut it out without sewing up a muslin first. Big mistake! I should know better but I was under the pump for time. It's funny because I thought having such and easy pattern would mean I could sew it up really quickly and being such an experienced sewist (not) I could just whip it up no problem.  All the basics went out the window. I didn't fit it, I didn't mark it properly I just went ahead like a bull at a gate.
Once I sewed the sleeve up I decided to try it on. OMG. It looked awful. The sleeve just didn't work at all! It needed to be more batwing and it was totally the wrong fabric. I decided to cut the sleeve out and go back to the original pattern. After sewing it up and trying it on again I found the armhole too small which I often find with patterns. Maybe I've got really low set armpits! I unpicked again and re sewed the armhole. Much better this time. Finally I added the bow as per the pattern using a pin that I can detach if I decide I don't like the bow.

Finally, I have finished and I'm pretty happy with it now but for such a simple design it turned out to be a real pain in the butt!


 I took a pic of how it looked after I sewed the batwing sleeve in. You can see how ugly it looked. Didn't work at all!!


Burda 7225


Tuesday, October 8, 2013

Craft Mama's

My Son's School, St Kilda Primary is having it's fete on October 27th this year. I put my hand up to organise the sewing bees for Craft Mama's which is a group of mum's who sew and knit for the fete.
I have had two sewing bees so far and having a third this week. It was so much fun, I just thought I'd share a few pics from our first sewing bee.
We ate cake, chit chatted and got a bit of sewing done. Once we have completed everything I'll post more of the crafty stuff we have come up with.

I have a board on pinterest where I have been collecting ideas. 
 I made the pattern for this Owl myself by tracing off one that I already had.
 Ironing has never been so much fun!
 Stuffing lavender bags, hmm not so much fun!
 Tooth fairy pillows
 Lavender bags

 Lovely ladies
Still stuffing!

If you live in the Melbourne area, try to get down to our fete as it is huge! We have lots of celebrity parents who are performing.
"House Husbands" favourite Rhys Muldoon, disgracefully funny mother of 5 Fiona O'loughlin, comedian Greg Fleet and the relentlessly hilarious Bev Killick will be performing just to name a few.
There will be rides, talent shows, vintage clothing, craft mama's goods, lolly stands, the list goes on. It's a great day out!

Wednesday, October 2, 2013

LBD - Project Sewn Sewalong

Project Sewn is a 4 week sewing competition comprising six designer/sewists who are all given a theme each week to base their looks on.  They are then scored by their fellow competitors and are opened to an online popular vote.  At the end of the voting period the votes are tallied and based on this combined score. One designer is sent home and one is announced a winner for each week.
Along with the "professional" competition there is also a little sewalong for anyone to enter based on the same theme the designers have each week.
I'm definitely going to sew along with this one. I need to use a lot of my stash so I'm making a personal vow to myself to only use fabric and supplies that I have on hand already and to sew along each week not just enter something I've already sewn. Update: Broken vow in Week 2. Entered something I made up last month as my mum is in town and I need to spend some QT with here.


Week number one is the LBD. The little black dress is an essential part of any woman's wardrobe and guess what? I didn't have one! 
I was pretty happy when I sorted through my stash box and found the following:

Black Silk Shantung which I picked up from Lincraft. I remember it was a little pricey so I'm glad I'm finally using it.
Black lining and a 20cm of a black sequin fabric (no idea why I bought this)
Pattern V8555 I picked up when Spotlight had one of those $5 pattern deals on. I thought it looked like a nice staple pattern to have in my collection.
Black zip. 

Wow, I had everything. No need to take a trip to the fabric store which is great as I would end up coming home with another purchase which has nothing to do with the LBD challenge.


The pattern is V8555 which I checked out on Pattern review. They all looked amazing and had great reviews so definitely worth sewing up.

The Silk shantung creases easily and I had it folded for a while in a box so I had a lot of pressing to do before I started. Also worth noting is that it frays a lot. I decided to use a black sequin fabric for the midriff section which adds a nice sparkle and bit of glamor but it was very bulky and slippery. I made sure I tacked everything in place before sewing and it worked really well. I trimmed back the seams a lot to reduce the bulk. 


I really liked sewing this pattern, it was easy and fits well. I didn't realise that a normal dress zipper was to be inserted and had sewn the CB seam already before reading this instruction.  I didn't want to ruin the look of the dress by machine stitching the dress zip in so I used the couture method of stab stitching. This requires lots of tacking in place first. But, I'm so glad I did as it turned out beautifully. I will definitely use this method again. You can really manoeuvre the zipper so it fits perfectly.

What I really love about this LBD is that it reminds me of those gorgeous 50's style dresses like Audrey Hepburn used to wear. All I need now are some long gloves and pearls. Actually, you might notice I'm wearing pearls. They are a little present my 8 year old son gave to me for mothers day. He bought them from his School for $1! He is always asking why I don't wear them, so now I can show him that I think they are special enough to wear with my special dress.


           Now I have a little black dress in my wardrobe and I've used a fair chunk of my stash,                                                                             thankyou ProjectSewn.


    To reinforce the seam with the slit I made seam binding out of the 
silk shantung 


 I used the couture method of stab stitching for the zipper which
 required three rows of tacking


 The midriff was challenging as I had four layers of fabric, lining,
interfacing, sequin fabric and main fabric.


You can vote here form my dress in the competition. I am number 12.
Thanks!


Wednesday, September 25, 2013

Recycled Pillowcase Halloween Treat Bags

It's only been the last few years where Halloween has taken off in Australia. We never used to celebrate it as children back in the "Old Days".  My kids were keen last year after our neighbours dropped an orange balloon and a note in our box asking if we were interested in participating to put the balloon out the front of our house. What a great idea.
As I am new to Halloween I hadn't really prepared so I whipped out the face paint, a cat mask and a tee which I sewed earlier for a Cat in the Hat costume. The rest of the kids came out looking smashing and off they went. I soon realised I hadn't given them anything to collect the treats in and shoved a few plastic bags in their pockets. They did the job but I decided this year I would do better.
I have loads of old pillowcases at the moment that were donated by St Kilda Mums as they can't use them for health and safety reasons. I am using them to make dresses, buntings, aprons and anything else I can think of for the up and coming St Kilda School Fete
Whilst researching "recycled pillowcases" I came up with a few posts on Halloween Treat Bags!! What another great idea. I decided to test them out. They are very simple and I think look fab.
 Firstly, cut a potato in half and carve out a triangle shape. Get some orange fabric paint and dip it in.
Get an old pillowcase, preferably white or a light colour. Put a piece of paper inside so that the paint doesn't come through onto the other side and stain your table (I figured this out quickly). Come up with any design you like for the pumpkin and stamp away.  I let my kids do the stamping and they decided on eyes, nose and scary teeth! You can paint a shape like a pumpkin or just leave it with the stamps. Let the pillowcase dry overnight on a flat surface and press on the wrong side when it is dry to set the paint.
 Meanwhile make the tie. Luckily, I had some old orange tee fabric and an old black tee. I cut strips, braided it and made a tie.
Now here is where your sewing skills come in. Before making the casing for the tie sew two button holes big enough to thread your tie through at the top and in the centre of the pillowcase. Fold over and sew around creating about a 5cm casing. Thread your tie through using a big safety pin.
Ta Da! A BIG treat bag for Halloween.